
Image Annotation Tools
1. Annotation interface
1.1 Basic Toolbar
1.2 Item OperationBar
1.3 Label List
1.4 Settings
1.5 Task Setting
2. Label Check
2.1 Pre-inspection
Here are the Pre-inspection steps:
- Configure Pre-inspection in Task Settings: Set up pre-inspection within the task settings to establish the criteria that will trigger a warning.
- Automatic Check Before Submission: The system is designed to conduct an automatic check on the annotation results automatically before they can be submitted.
- Data Submission Interception for Non-Compliance: If there are any discrepancies or non-compliant aspects in the data, the submission will be intercepted to avoid forwarding incorrect or incomplete submissions.
Pre-inspection warnings can appear during the temporary save or submission process, or they can be manually refreshed by clicking the icon button in the pre-inspection list.
2.2 Error Label
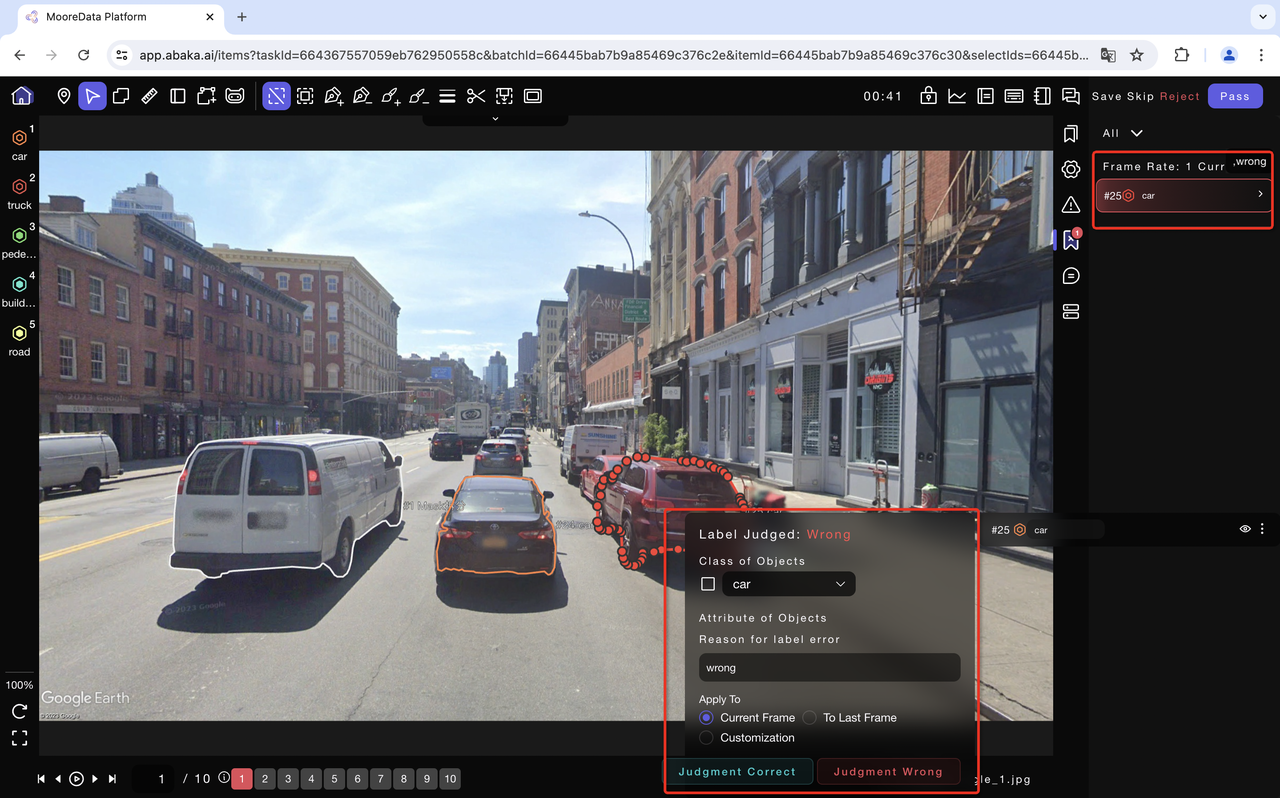
- At the audit node, you can mark the label as incorrect. The incorrect label will be displayed by frame in the error list.
- Clicking on an error label will take you to the corresponding frame and highlight the label on the canvas.
- The audit node's judgment of missed tags will be displayed by frame in the annotation list. Clicking on an annotation will jump to the corresponding missed tag location.
- Resolved missed tags will be categorized under the "Resolved" section.
- &##x20;Labels that have been revised will turn yellow and be categorized under the "Revised" section
3. Image Annotation Task
3.1 Image Detection
- Select the Corresponding Label:Choose the appropriate tag from the list on the left side.
- Draw the Rectangle:Click to set the first corner of the rectangle, then move to the diagonal corner and click again to complete the drawing.
- Adjust the Existing Label: To adjust an existing tag, select it and drag any of its control points to resize or reposition it as needed.
- Group Label Together: To group tags, click on "Merge into Group" in the basic toolbar at the top or press the shortcut key 'G', then select the tags you wish to group in sequence. Press 'G' or 'Esc' again to complete the grouping process.
- Ungroup Label:To ungroup, press the shortcut key 'Shift+G', click on one or more tags that you want to ungroup, and then press 'Shift+G' again to complete the ungrouping process.
3.2 Image Per-Frame
- Enable the "Per-Frame Tagging" option. When this feature is activated, any tags you draw will appear on every frame with a consistent ID.
- Draw a tag that will appear on the current frame and all subsequent frames, but not on any preceding frames. For example, if you draw the tag on frame 3, it will appear at the same position from frame 3 to the last frame, but it will not be present on frames 1 and 2.
- Apart from the first frame where the tag appears, any movement or resizing of the tag on any subsequent frame will automatically mark that tag as a keyframe. Other frames will automatically calculate interpolation for the tag as interpolated frames.
- Per-Frame Tagging Options:
- Right-click on a per-frame tag, and in the pop-up tag box, select "Delete This Frame" to remove the tag only from the current frame, leaving it on all other frames.
- Choose "Disappear from Next Frame" to remove the tag from the next frame to the last frame.
- Select "As Interpolation Frame" to set whether the tag should automatically calculate interpolation.
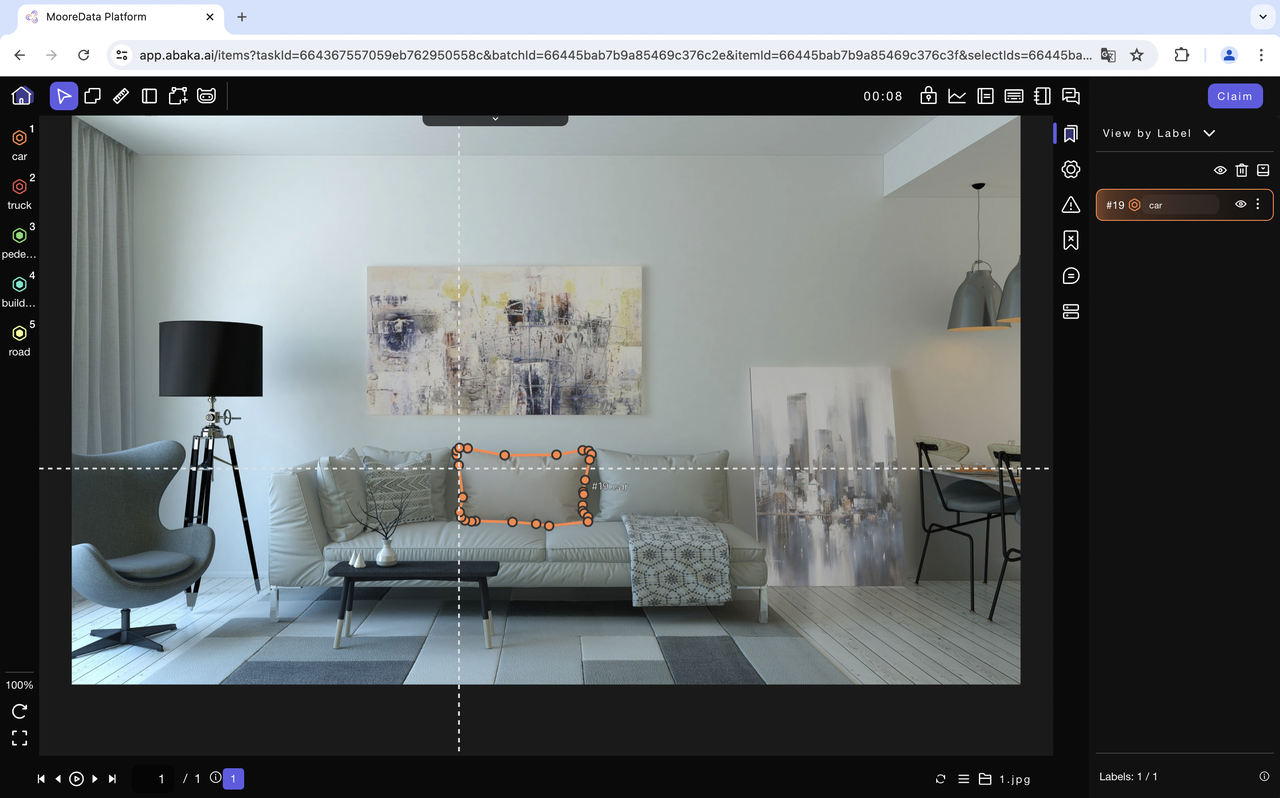
3.3 Image Semantic Segmention
- In the tag list on the left, select the corresponding polygon tag.
- Click to view the Mask image.
- You can compare and view the current annotated mask image to prevent issues of missing tags and incorrect tag layer order.
Edge Sharing:
Automatic and manual edge sharing for polygons cannot be enabled simultaneously. Please choose the edge sharing mode flexibly according to the annotation requirements.
- Automatic Edge Sharing: After selecting a polygon tag in the tag bar on the left and entering the drawing mode, the automatic edge sharing option will appear in the top basic toolbar. Once enabled, all subsequent polygons will automatically share edges.
- Manual Edge Sharing: Press the shortcut key “~” to activate manual edge sharing mode. At this point, each vertex of the polygon can be clicked and snapped. Holding the Alt key allows snapping to the edges of the polygon.