Batch
1. Batch
1.1 Batch list
- After completing the task creation, enter the Task Batch to view the batch list.
- The batch list supports settings, copying, and deletion operations for batches.
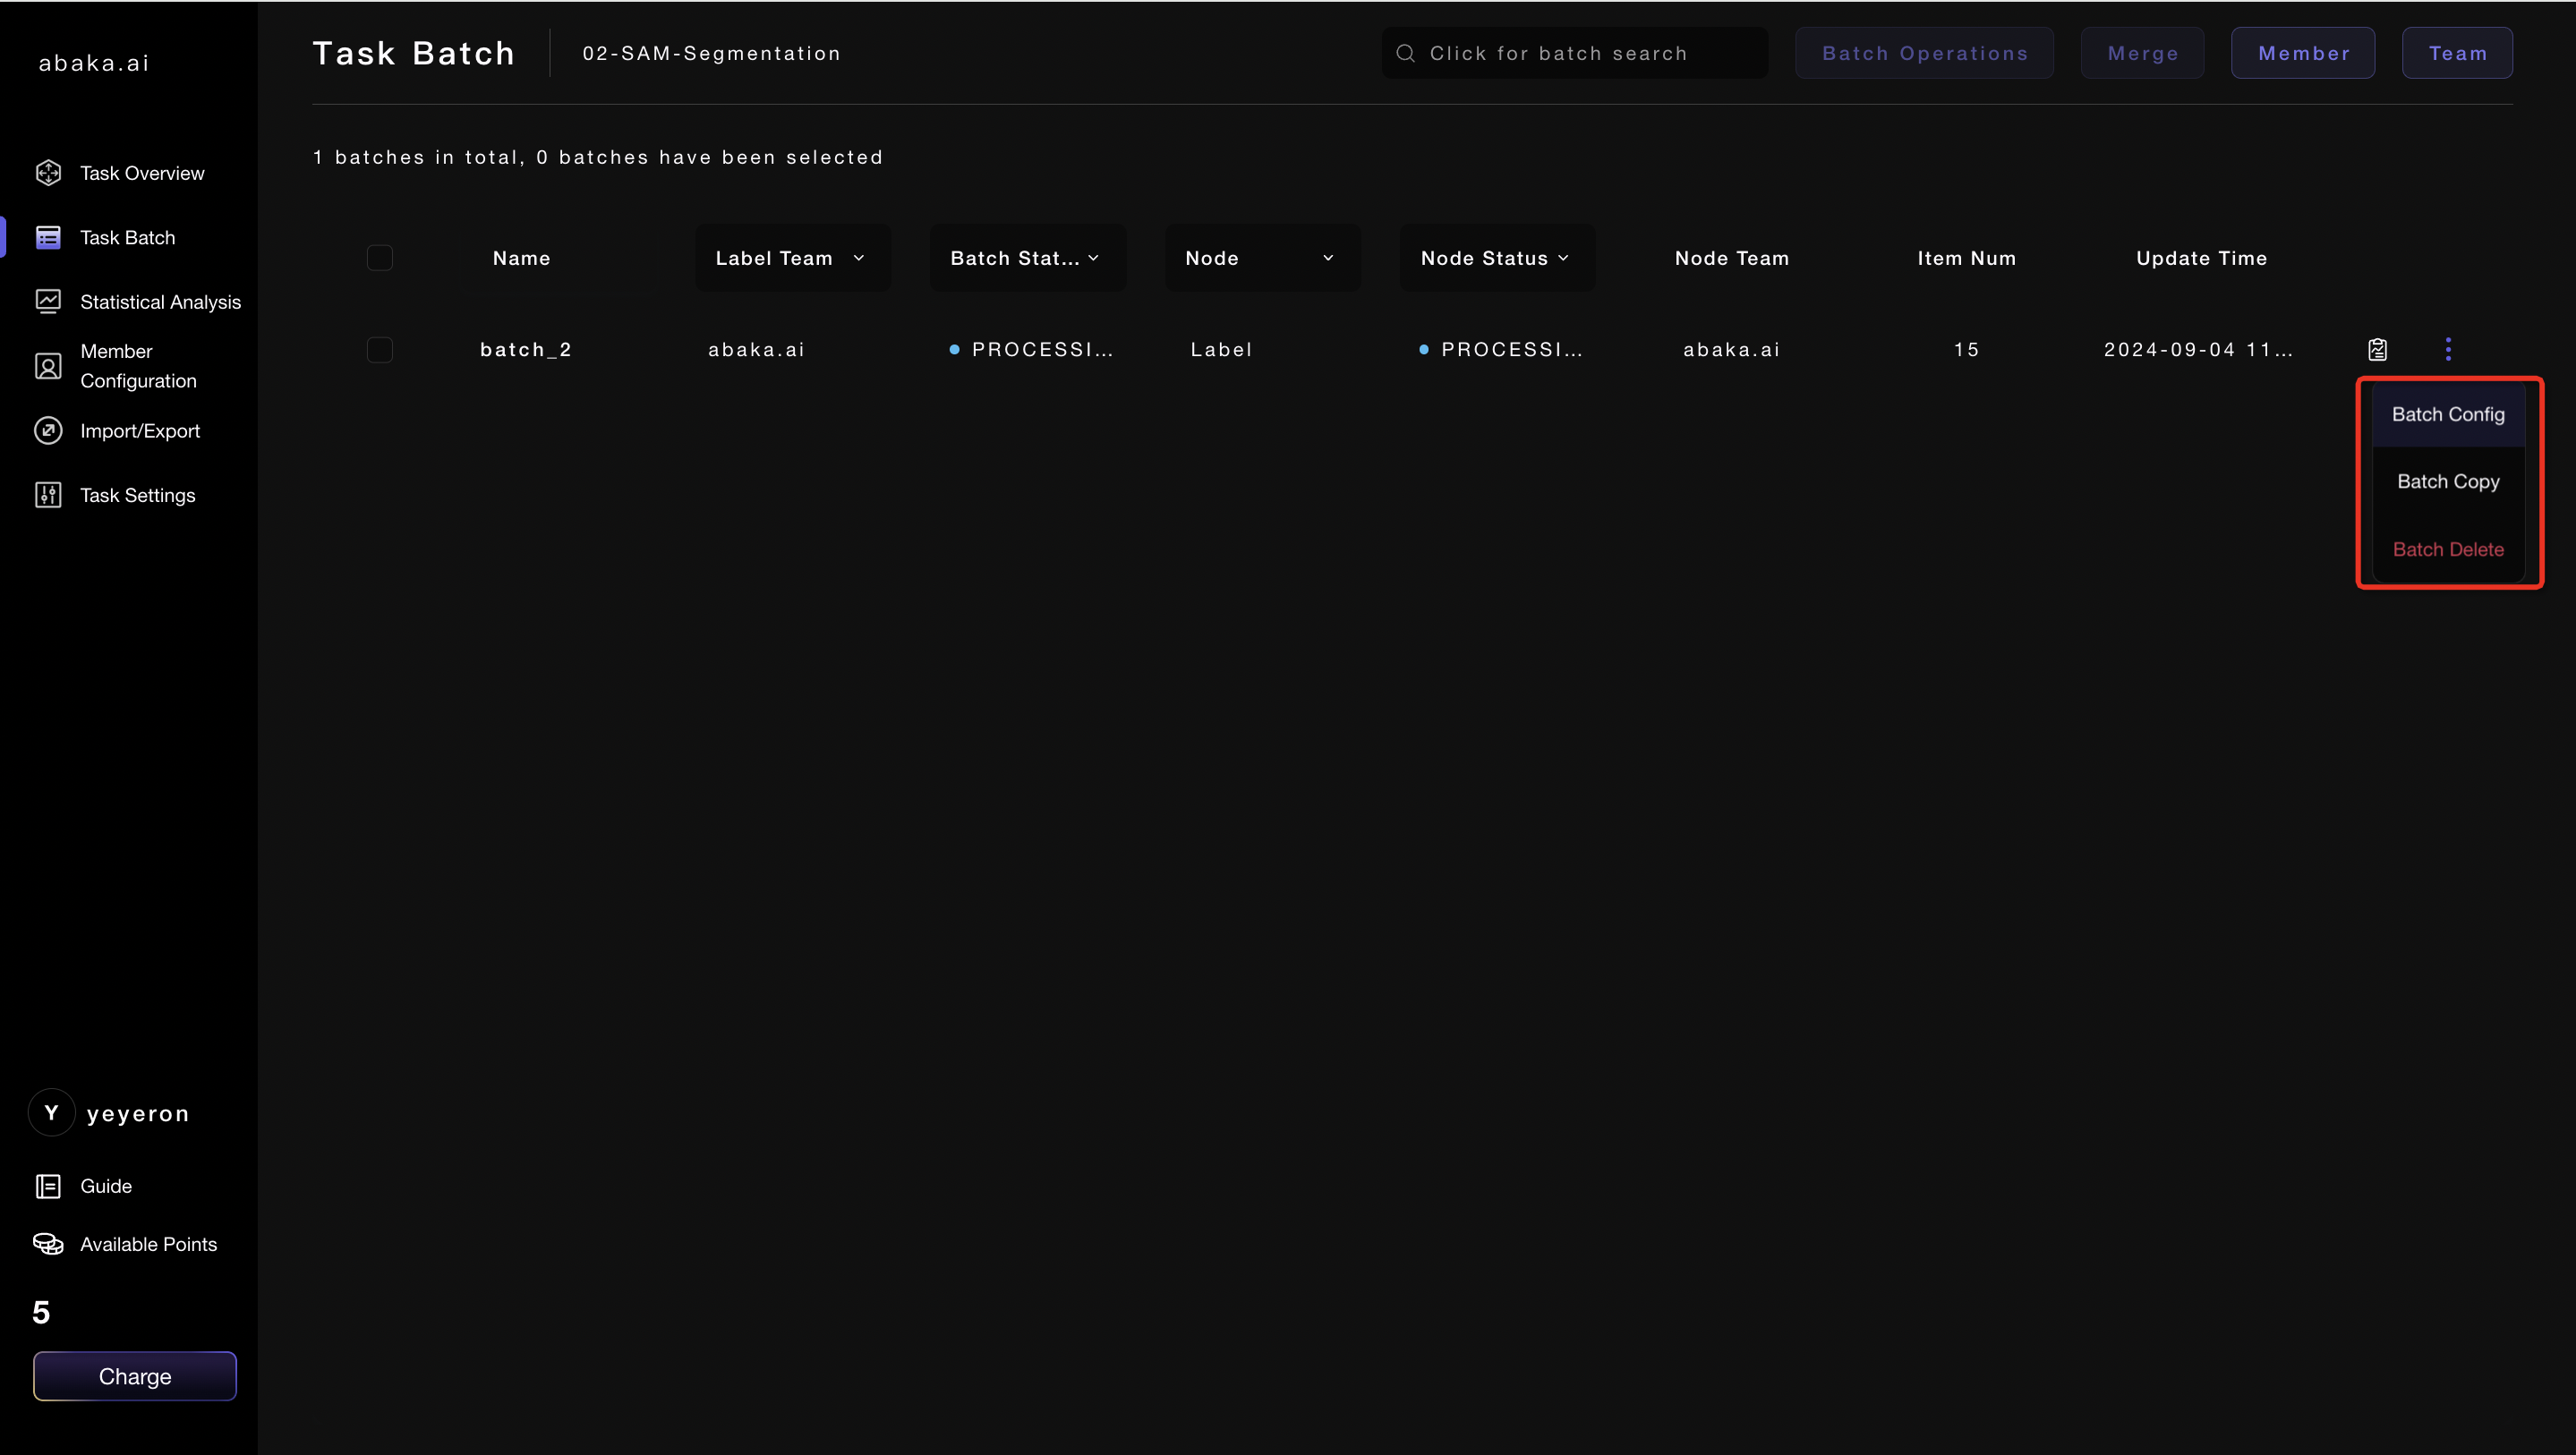
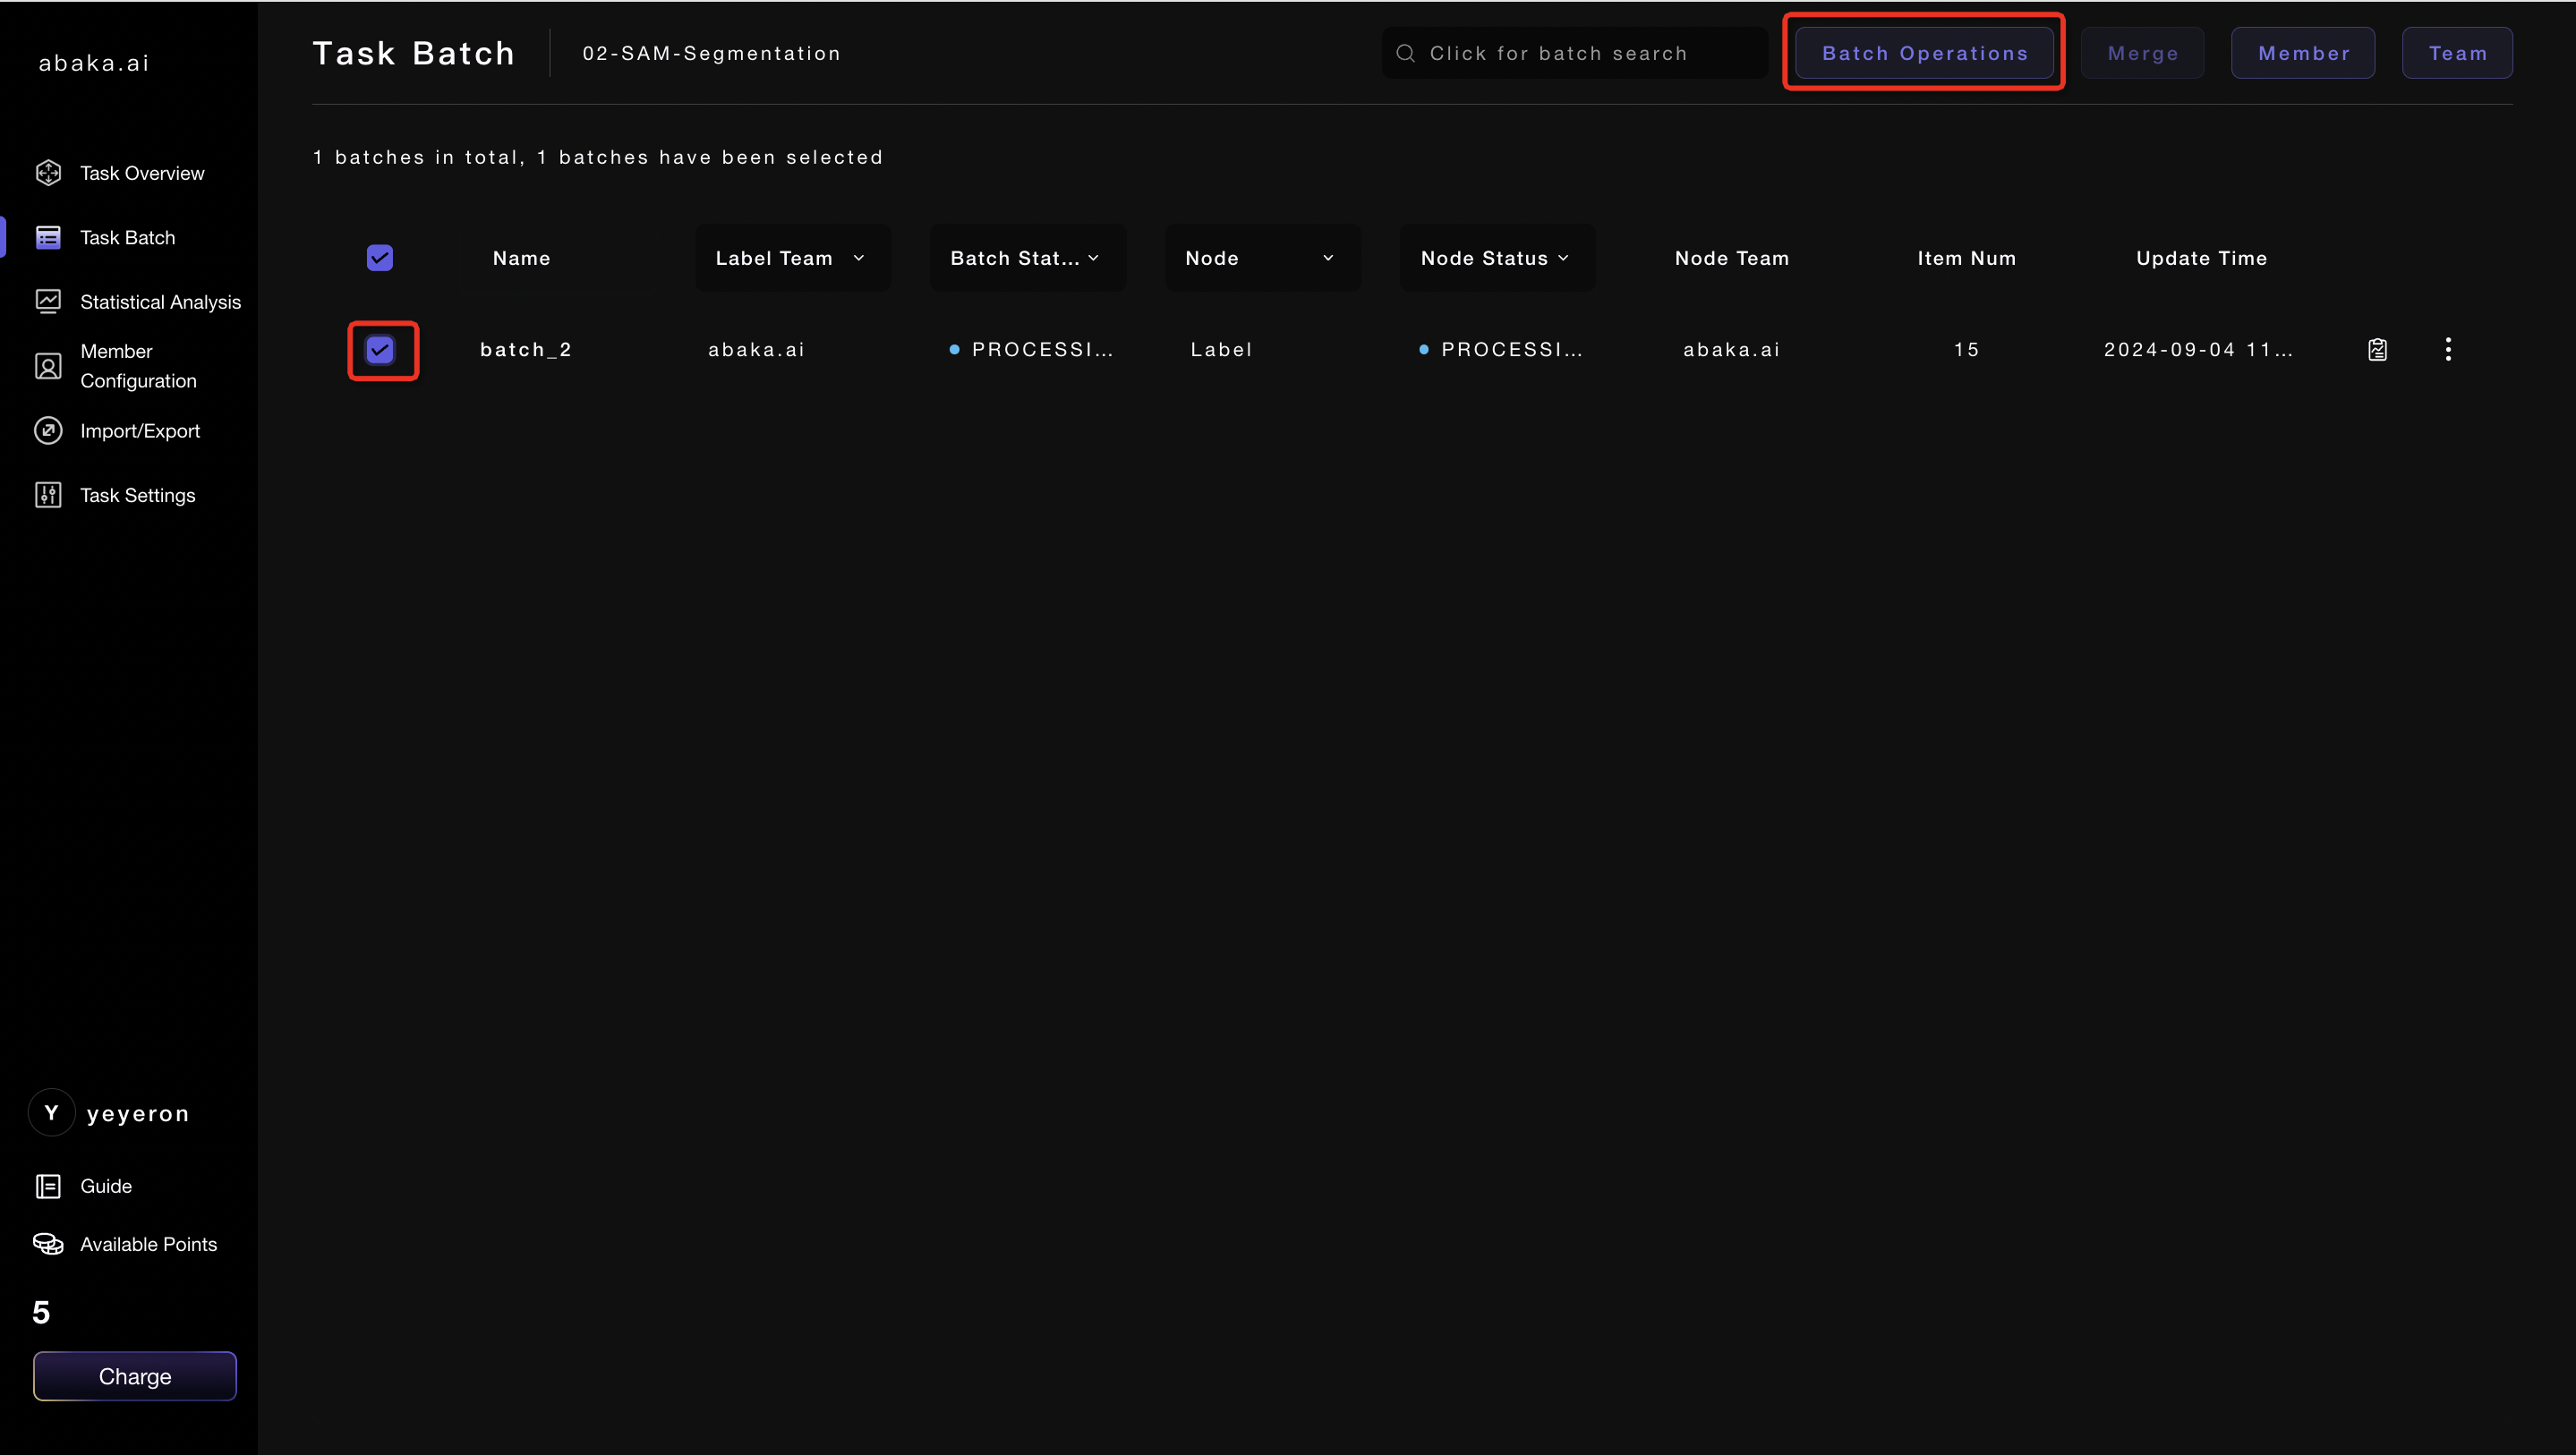
- It also supports multiple operations for multiple batches.
- If users need to start multiple batches at the same time, they can check the boxes for the batches they want to start, click the start button at the top right, and launch the selected batches.
- If users need to merge multiple batches, they can check the boxes for the batches they want to merge, click the
mergebutton at the top right, select the batch to merge into in the popup, and clickconfirmto complete the data merge of the batches.
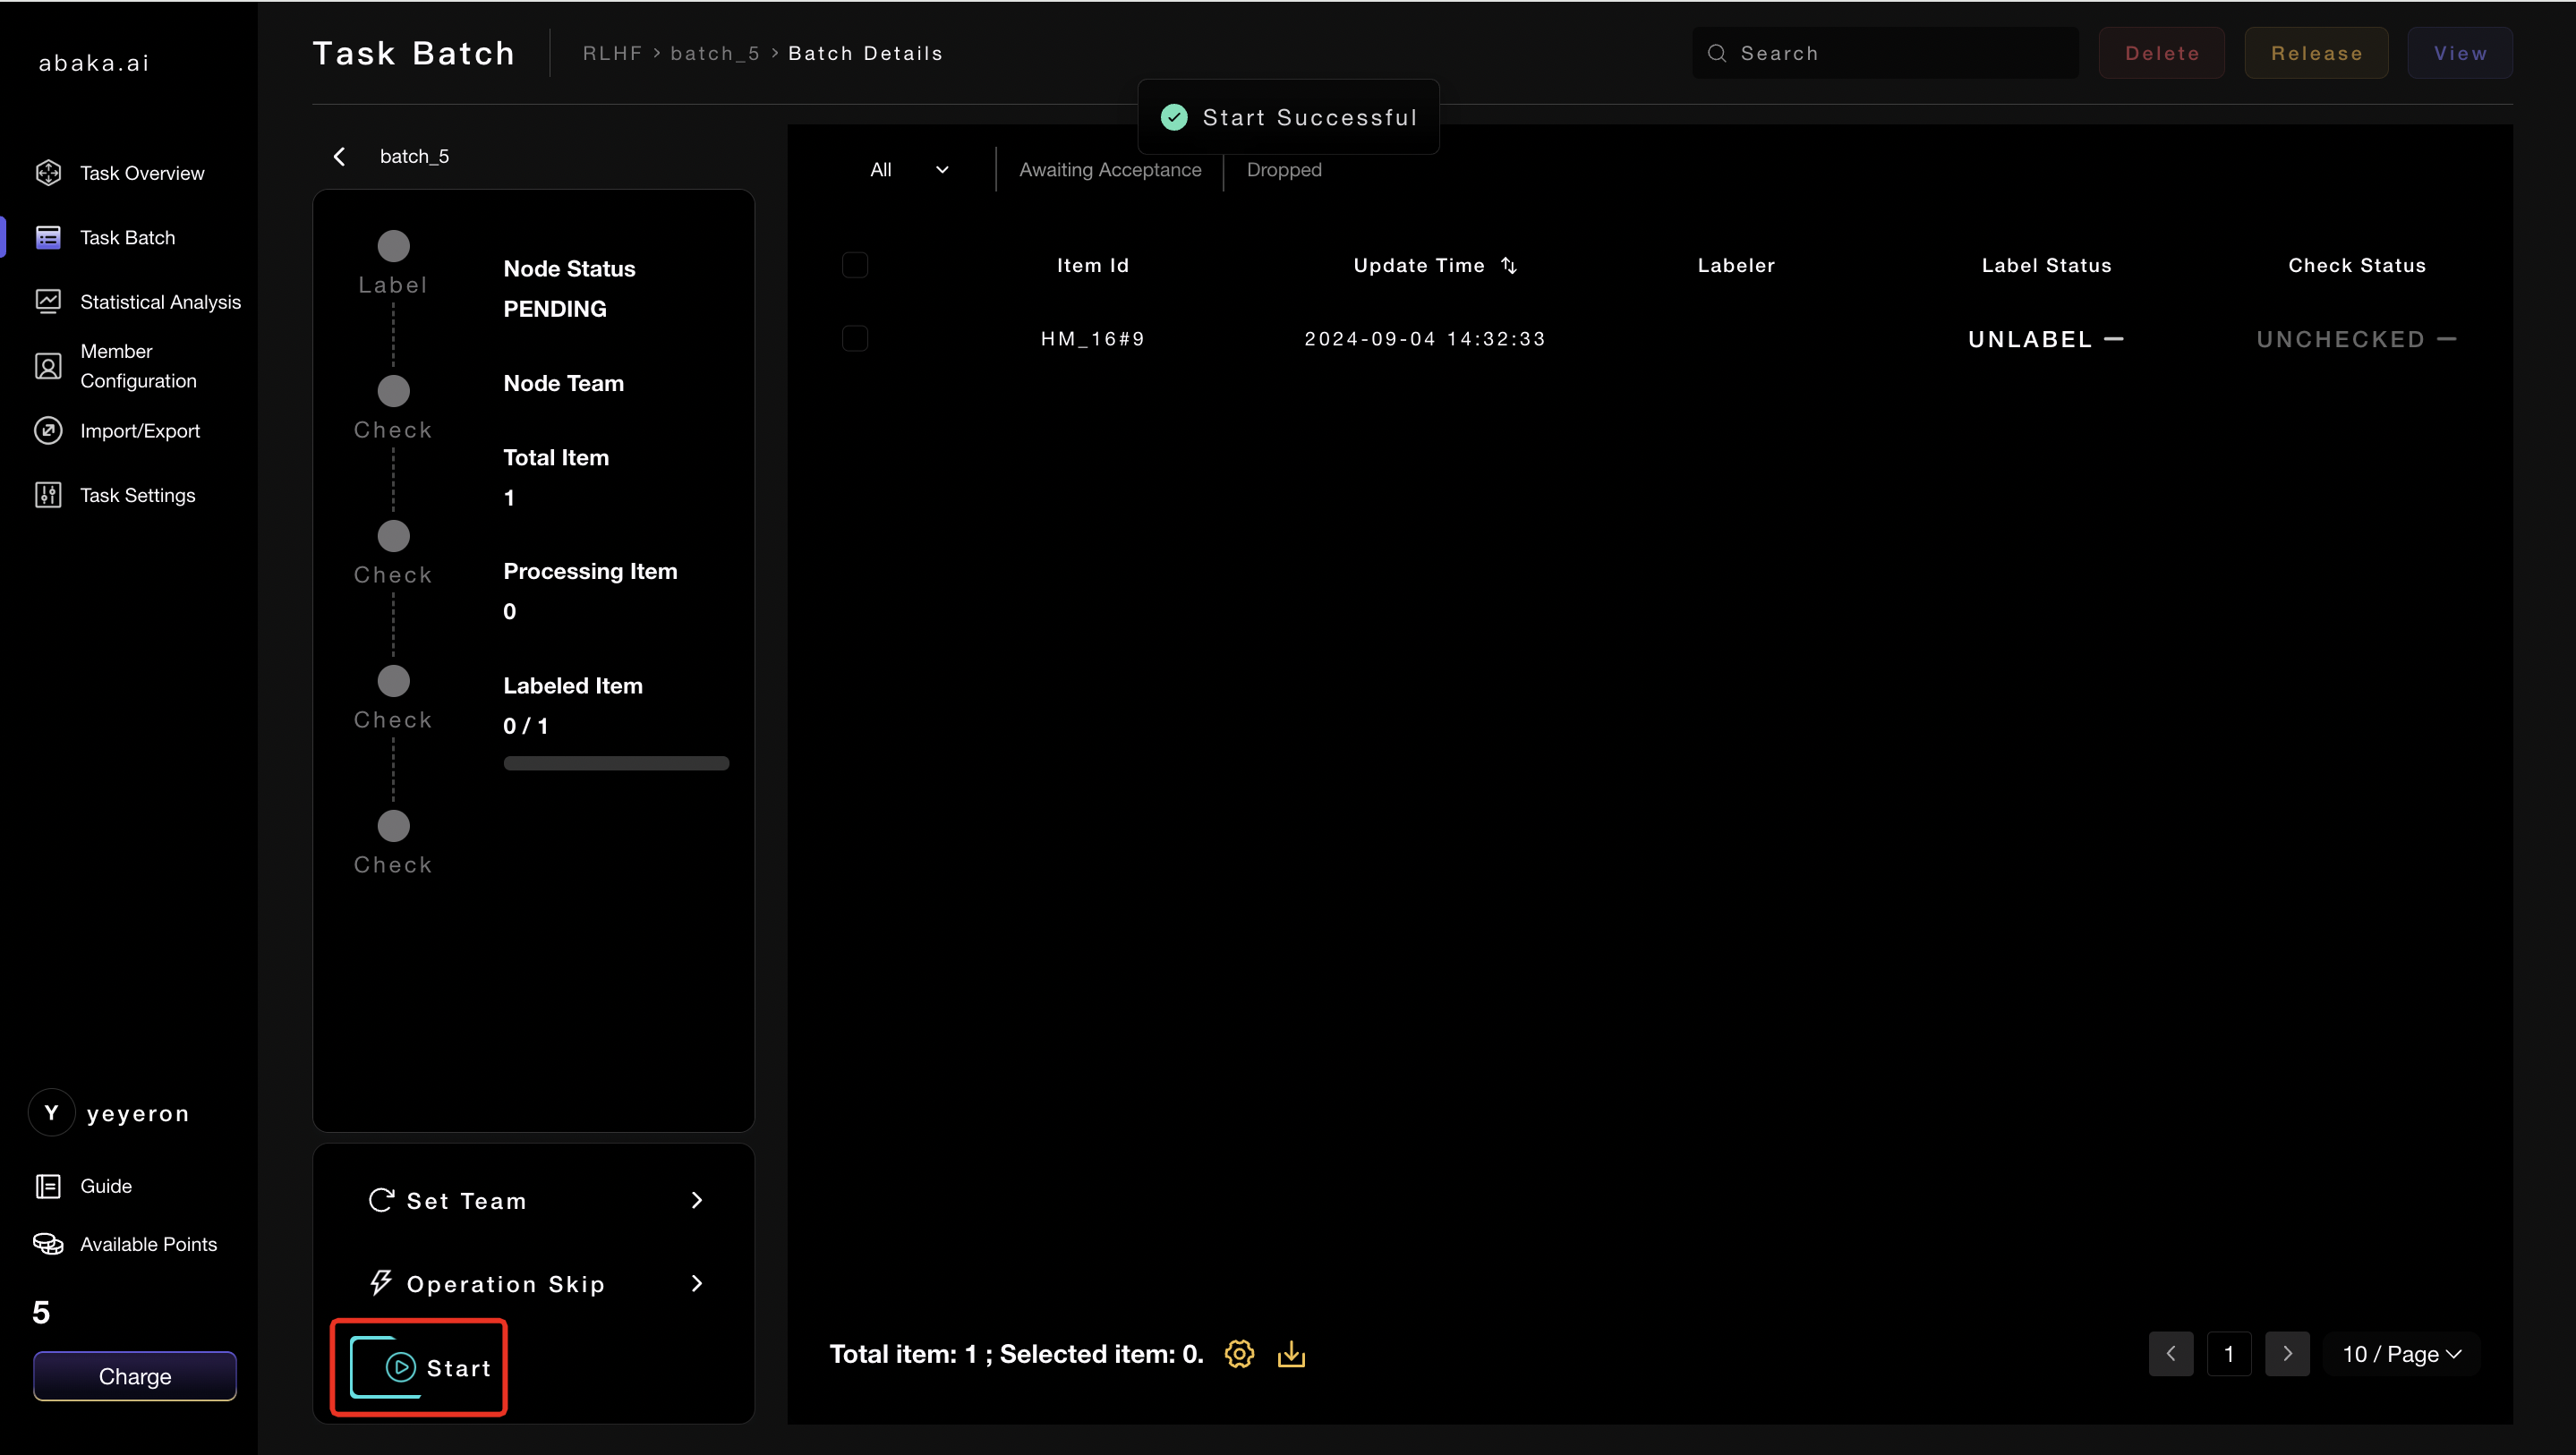
1.2 Batch Start
Please note that only the administrators of the current node and the task creator can perform operations such as batch start, push, skip, and return.
Enter the batch details, the newly created batch is in the 'Not Started' state.
-
startthe batch and activate it for subsequent operations. - Click the
startbutton at the bottom left to push the batch to the annotation node. - At this time, the process diagram on the left shows the current node as 'Annotation'.

1.3 Node Skip
- Click the
node skipat the bottom left. - Select the node to be skipped in the popup.
- Click the
savebutton to complete the settings.
2. Batch Assignment
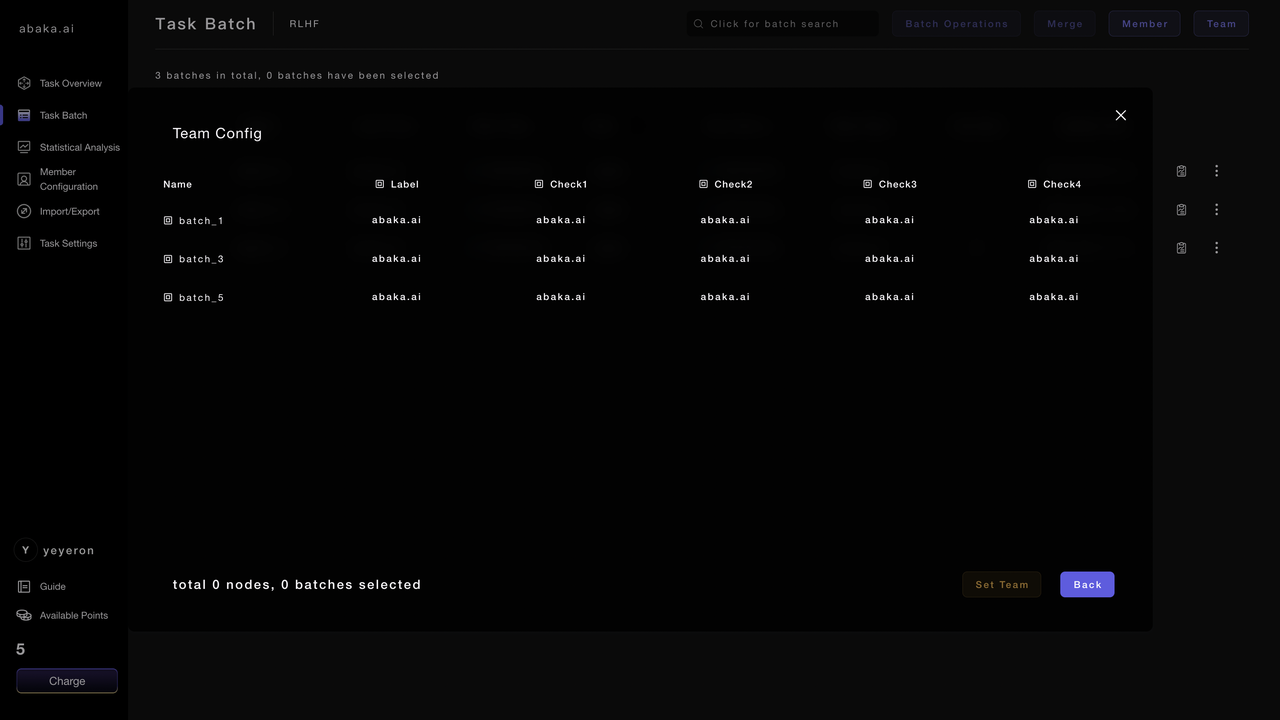
2.1 Teams
- Click on the team in the upper right corner to choose different nodes for team configuration.
- After selecting the node, click on "Set Team", and in the pop-up window, select the operational team
- Click the reset button to complete the configuration.
- configure the production team corresponding to different nodes.
2.2 Member
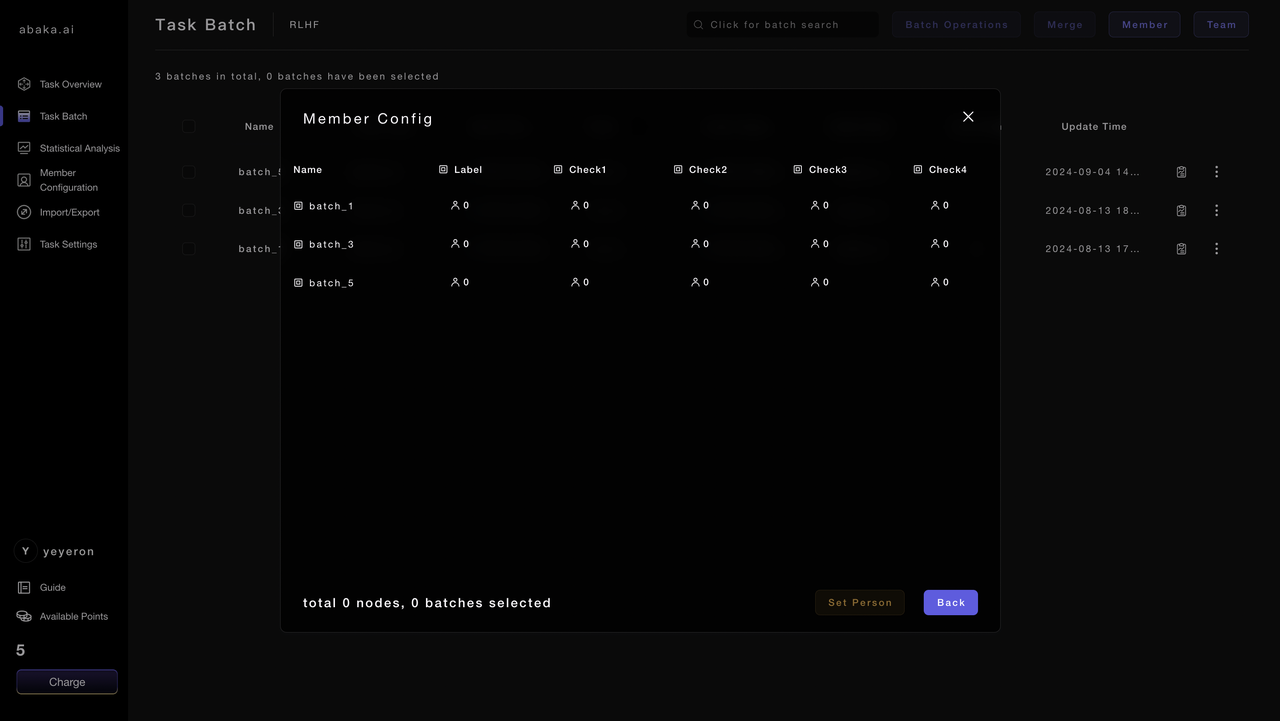
2.3 Batch
The Administrator can set different members to act as "Administrators/Members" of the nodes, or cancel their role permissions.
- Click the
annotation/checkicon to enter the node configuration interface. - Check the required team members or search for member names, and select to set them as 'Administrator' or 'Member' in the bottom right corner.
- After completing the settings, the top will prompt 'Node modification successful'.
- If you need to delete a node member, click the details icon on the right in the node configuration interface, click to
delete the role, and the prompt will show the modification is successful.

2.3.1 Node Member Permissions
- Node members enter the batch list and directly click to
receive annotationsto receive items, and then enter the annotation interface. - After successfully receiving, the item list will refresh to show the received items.
- Node members do not support deleting items.
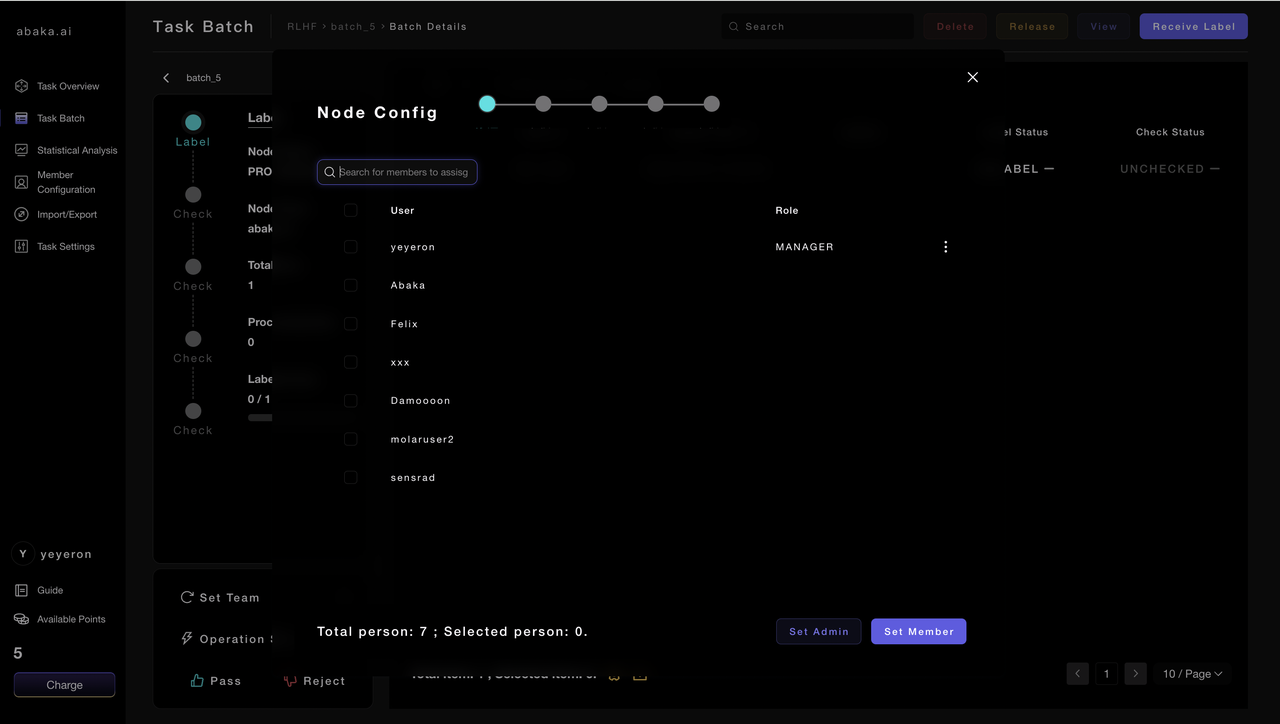
2.3.2 Node Administrator Permissions
- Administrators enter the batch list, and the item details list will display all items.
- Administrators can choose to click to
receive annotationsor check the items they want to annotate. - Administrators have the right to 'delete', 'release', and 'view' items.